Please Choose Your Language
Views: 0 Author: Site Editor Publish Time: 2026-07-08 Origin: Site
Retailers are executing a strategic shift away from high-turnover temporary point-of-purchase materials. Brands now prioritize durable, long-term retail footprints to secure prime merchandising real estate. Designing these permanent fixtures requires significant upfront capital. Design flaws, poor material selection, or retailer non-compliance quickly result in stranded assets and diminished brand equity. You must engineer structures that survive harsh retail environments while maximizing product visibility.
This article provides a technical framework for engineering retail displays. You will learn how to balance structural durability with strict retailer guidelines. We explore optimized visual merchandising techniques to drive sustained conversions. Mastering these design principles ensures your retail investments generate measurable returns over their entire lifecycle.
Material Strategy Dictates Lifespan: Selecting the right mix of metal, wood, and acrylic is a mandatory balancing act between aesthetic vision and structural integrity.
Compliance is Non-Negotiable: Even the most visually striking display will fail if it violates retailer footprint constraints, weight limits, or safety protocols.
Modularity Extends ROI: Designing permanent structures with interchangeable graphic panels and adjustable shelving prevents the display from becoming obsolete during seasonal product transitions.
Illumination Drives Conversion: Integrating targeted lighting solutions directly into the fixture architecture significantly increases product visibility in high-density retail environments.
Successful permanent displays begin with strict adherence to spatial constraints. You must evaluate floor space limitations, endcap dimensions, and aisle flow metrics before drafting any concepts. Retailers enforce strict footprint rules to maintain safe customer navigation. Standard endcaps typically allow for 18 to 24 inches of depth. Exceeding this by even a fraction of an inch guarantees store-level rejection. You must understand the difference between clean store policies and acceptable fixture footprints. Clean store mandates often restrict freestanding units entirely, forcing brands to adapt inline shelving systems that integrate directly into existing gondolas.
Positioning fixtures strategically within specific retail zones dictates shopper interaction. Map the retail journey carefully. Place units in entryway appetizer zones for immediate brand engagement. These areas require high-impact visuals and low-profile bases to avoid bottlenecking foot traffic. Utilize high-volume main store entrée aisles for core product discovery. Here, verticality matters more than width. High-impulse point-of-sale checkout lanes require compact, high-density structures to capture last-minute purchases. Checkout units must hold maximum inventory in a footprint often no larger than 12 by 12 inches.
Establishing the expected lifecycle is critical for material selection. Most permanent fixtures remain active for one to five years. You must weigh initial manufacturing costs against this operational lifespan. Factor in routine maintenance and replacement parts. Consider the cost of restocking friction. Displays requiring complex restocking procedures waste labor hours and often remain empty, directly hurting sales velocity. A unit that takes ten minutes to restock will be ignored by store associates in favor of simpler fixtures.
Design for component replacement rather than full unit disposal. If a graphic header gets scratched, the store team should be able to swap it out without replacing the entire steel frame. Standardize your hardware. Use common fasteners like Phillips or hex head screws so field merchandisers can perform quick repairs without specialized toolkits.
Standing out in a crowded category requires calculated visual disruption. Define your visual disruption metrics early in the design phase. Establish baseline key performance indicators for product sell-through rates post-installation. Leverage unique silhouettes and forms to break the visual monotony of linear retail shelves. Distinct physical shapes and structural contours immediately capture shopper attention. A curved header or angled base creates a visual interrupt that forces shoppers to pause.
Color contrast plays a massive role in visual disruption. If the category standard is white wire racks, deploying a matte black powder-coated steel unit instantly draws the eye. Use negative space strategically. Overcrowding a display makes it look like a discount bin. Leaving intentional gaps between premium products elevates their perceived value.
Material selection dictates both structural integrity and visual appeal. You must evaluate the structural limits of primary materials. Powder-coated steel offers superior load-bearing capacity compared to extruded aluminum. Solid wood provides premium aesthetics but weighs significantly more than MDF with veneer. Assess material degradation risks in high-traffic commercial environments. Scratching, fading, and moisture damage destroy brand equity rapidly. Select scratch-resistant laminates and UV-cured inks to mitigate these risks.
Material Type | Load Capacity | Best Retail Application | Degradation Risks |
|---|---|---|---|
Powder-Coated Steel (16-Gauge) | High (Beverages, Heavy CPG) | Freestanding Floor Units, Endcaps | Rust if coating is deeply scratched |
Extruded Aluminum | Medium (Cosmetics, Electronics) | Countertop Units, Inline Frames | Denting under heavy impact |
MDF with Melamine Veneer | Medium (Apparel, Packaged Goods) | Shelving, Base Cabinets | Edge chipping, moisture swelling |
High-Impact Polystyrene (HIPS) | Low (Lightweight items, Graphics) | Headers, Shelf Liners, Trays | Cracking under extreme cold |
Combining dissimilar materials elevates the perceived value of your merchandise. Industrial metals paired with organic wood textures signal premium product quality to the shopper. However, managing the manufacturing complexities requires precise engineering. Joining metal to wood demands specific tolerances to account for material expansion and contraction. Wood breathes and shifts with humidity; steel does not. If you bolt them together too tightly without expansion gaps, the wood will split.
Use hidden fasteners and structural adhesives to maintain clean sightlines while ensuring robust connections. Keyhole slots and shoulder rivets allow materials to lock together securely while permitting slight movement. This approach also speeds up assembly time on the factory floor.
Grocery, cafe, and food service environments demand specialized material applications. Select sanitary, food-safe finishes. Non-porous surfaces prevent bacterial harbor and simplify daily cleaning protocols. Engineer moisture-resistant structures for wet-grocer zones or high-humidity environments. Refrigerated-adjacent endcaps require rust-proof hardware and sealed edges to prevent delamination caused by condensation.
For outdoor or garden center displays, specify zinc-plated hardware and UV-resistant powder coats. Standard indoor finishes will chalk and fade within months when exposed to direct sunlight. Always test your chosen materials against the specific cleaning chemicals used by the target retailer. Some industrial floor cleaners will strip the finish right off a low-grade laminate.
A well-engineered Branded tiered metal display rack maximizes SKU density within a minimal footprint. Utilizing tiered architecture allows shoppers to view multiple product variations simultaneously. You must engineer load-bearing capacities specifically for heavy consumer packaged goods or beverage items. Reinforce the base and utilize heavy-gauge steel for the primary uprights. A fully loaded beverage rack can weigh several hundred pounds. If the base lacks structural gussets, the unit will rack and lean over time.
Integrate permanent branding elements like die-cut headers or laser-engraved logos. These robust branding methods withstand retail wear and tear far better than applied decals. Shoppers and carts constantly bump into floor fixtures. A vinyl sticker will peel at the corners within weeks. A laser-cut steel logo plate backed with colored acrylic remains pristine for years.
Merchandising ergonomics directly influence purchase decisions. Apply the strike zone principle, targeting the area from waist to eye level for high-margin product placement. Products placed in this zone experience the highest sell-through rates. Design for accessibility across all demographics. Ensure bottom tiers remain reachable without excessive bending. Top tiers must remain visible without requiring shoppers to strain. Angle upper shelves slightly downward to improve product visibility.
Consider the physical interaction required to remove the product. If a shelf is too tight, shoppers will knock adjacent items over when reaching for their selection. Leave at least two inches of vertical clearance above the tallest product. For heavy items, ensure the shelf depth does not force the shopper to overextend their lower back when reaching for the back row.
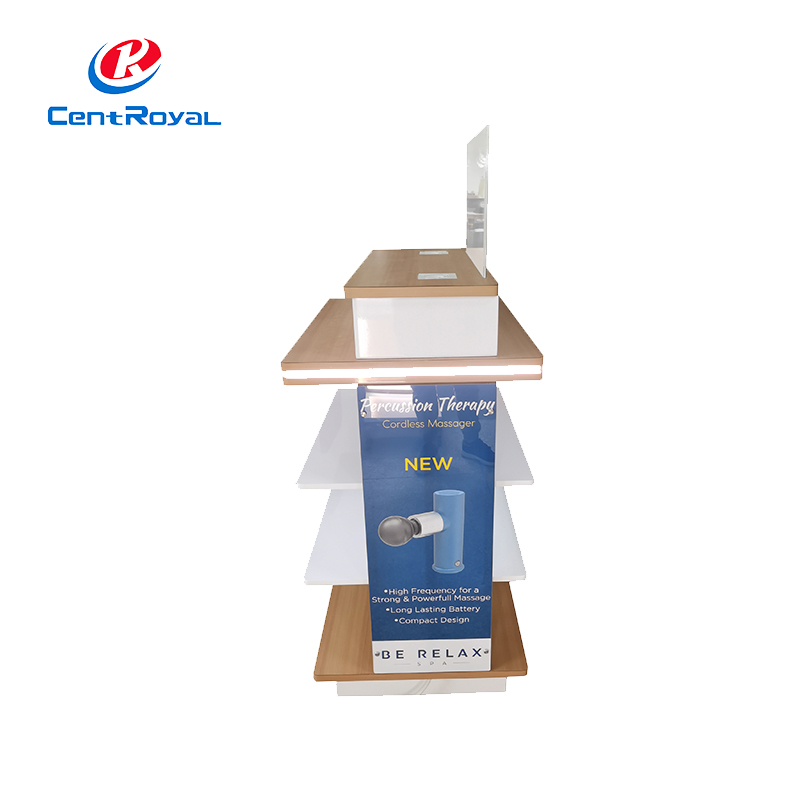
Integrating a LED lit tiered wood metal display dramatically increases product visibility. Overcoming the technical challenges of routing power requires careful planning. Conceal wiring within hollow metal extrusions or routed channels in wood panels. Exposed wires look unprofessional and pose a snag hazard for store staff during restocking.
Determine the power source location in the target retail environment (ceiling drop vs. floor outlet).
Select a UL-listed power supply that matches the total wattage draw of your LED strips, adding a 20% buffer to prevent overheating.
Route low-voltage DC cables through the structural uprights, using rubber grommets at exit points to prevent wire chafing.
Mount LED extrusions with frosted diffusers under each shelf to eliminate harsh hotspots on glossy product packaging.
Select the correct color temperature and Color Rendering Index. A high CRI (90+) ensures your lighting accurately reflects product packaging colors. A red box should look vibrant red, not muddy brown. Use 4000K to 5000K temperatures for electronics and modern cosmetics, while 3000K works better for organic foods and warm apparel. Manage heat output carefully. Integrated LED systems in enclosed retail spaces require adequate ventilation to prevent premature component failure and ensure safety.
Retail environments change rapidly. Engineer adjustable shelving brackets and peg systems to accommodate shifting packaging dimensions. Designing magnetic or slide-in channels allows for rapid graphic updates. Store associates can swap promotional messaging in seconds without tools. This modularity prevents the fixture from becoming obsolete during seasonal transitions, extending its active lifespan on the floor.
Use universal slotting standards (like 1-inch on center) for your uprights. This allows you to manufacture different shelf depths or peg hooks later without redesigning the entire frame. Build graphic headers as separate cassettes that drop into a welded top channel. When a new campaign launches, you simply ship a flat graphic card rather than a bulky header assembly.
Retailers enforce rigid safety guidelines. Design every unit for ADA compliance. Maintain proper aisle clearance, respect maximum reach heights, and eliminate protruding objects that pose hazards to visually impaired shoppers. The ADA requires a minimum of 36 inches for aisle clearance. Any object protruding from a wall or fixture between 27 and 80 inches off the floor cannot extend more than 4 inches into the aisle.
Meet retailer-specific requirements for tip-testing. Ensure base weighting prevents the unit from tipping when subjected to lateral force. A common standard requires the unit to withstand a 10-degree tilt without falling over. Use edge radiuses to eliminate sharp corners. Specify fire-retardant materials where required by local commercial building codes. Wood components often need specific intumescent coatings to pass fire marshal inspections in enclosed mall environments.
Shipping logistics impact final execution. Shipping fully assembled units incurs higher freight costs but lowers the risk of store-level errors. Flat-packed units reduce freight expenses but carry a high risk of improper assembly by store staff. Design foolproof assembly mechanisms if shipping flat. Require minimal tools. Use interlocking tabs and captive fasteners to simplify the process for third-party merchandisers.
If a unit requires more than a single Allen wrench and 15 minutes to build, failure rates skyrocket. Color-code your hardware bags to match the instruction steps. Print assembly instructions on durable synthetic paper so they survive the shipping process. Better yet, include a QR code linking to a 60-second assembly video.
Maintaining presentation standards requires mechanical assistance. Create self-facing mechanisms like spring-loaded pushers or gravity-feed angled shelves. These systems keep products fronted automatically, reducing labor for store staff. Ensure all surfaces are easily cleanable with standard commercial solvents. Provide store associates with a localized visual display toolbox. Include touch-up finishes, extra fasteners, cleaning guides, and replacement clips. This kit keeps the display looking pristine throughout its active lifespan.
Design crumb sweeps into your shelving. A small gap at the back of a shelf allows dust and debris to fall through rather than accumulating around the product. Use clear acrylic front fences that slide out easily so staff can wipe down the shelf deck without navigating around fixed barriers.
Conduct a comprehensive physical store audit to measure exact aisle dimensions, power outlet locations, and competitor fixture footprints before starting the design phase.
Develop a localized visual display toolbox for each shipped unit, containing spare hardware, touch-up paint, and a laminated cleaning guide for store associates.
Execute a limited-run prototype test in three to five controlled retail locations to identify restocking friction points and structural vulnerabilities prior to full-scale production.
Establish a modular graphic update schedule, designing slide-in channels that allow field teams to refresh seasonal messaging without requiring tools or new hardware.
A: Permanent retail displays typically last between one and five years on the floor. Their exact lifespan depends heavily on material selection, construction quality, and the level of daily wear and tear in the specific retail environment. Units built with heavy-gauge steel and scratch-resistant powder coats consistently reach the five-year mark.
A: ADA compliance ensures your fixtures are accessible to all shoppers, including those with disabilities. Retailers strictly enforce these guidelines regarding aisle clearance, reach heights, and protruding objects to maintain safe, legally compliant store environments. Failing to meet these standards results in immediate removal of the fixture from the store floor.
A: Prevent tipping by engineering a low center of gravity. Utilize heavy steel base plates, widen the footprint, and conduct rigorous tilt-testing during the prototyping phase. Ensure the unit remains stable under lateral force, typically testing to a 10-degree tilt angle without the unit falling over.
A: Combining materials like metal and wood creates a premium aesthetic that captures shopper attention. It allows you to leverage the structural strength of steel for load-bearing uprights while utilizing the warm, organic textures of wood on shelves and headers to elevate overall brand perception.
A: Integrate self-facing mechanisms such as spring-loaded pushers or gravity-feed angled shelves. Ensure adequate vertical clearance between tiers so associates can quickly load new merchandise without dismantling parts of the fixture. Simpler restocking processes directly increase the likelihood that your display remains fully stocked.
A: A visual display toolbox is a localized maintenance kit provided to store staff or field merchandisers. It typically includes touch-up paint, spare fasteners, replacement graphic clips, and specific cleaning instructions. This kit empowers local teams to maintain the fixture's pristine appearance without waiting for replacement parts to ship.